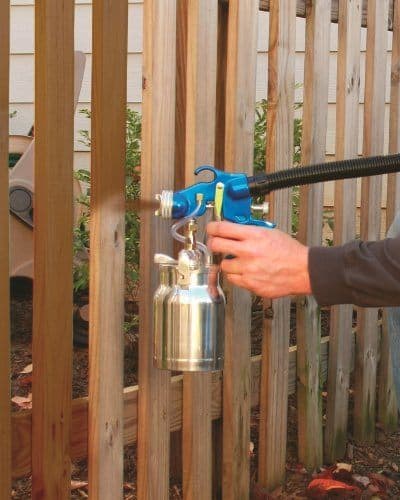
Anything can be done properly if you take the time to learn. Using an air compressor is no different and is less time-consuming than the traditional methods of using a brush and roller.
A couple of important factors to consider before using air compressors for spray painting should be the size of your project and which type of sprayer you will need.
Keep in mind that paint sprayers can be messy if too powerful, and it’s usually best to opt for one with a low-pressure spray as they are easier to use resulting in less wasted paint and over-spray which can cause your project to take on a poor and messy looking finish.
If you haven’t had the experience of using an air compressor for painting applications, it would be best to practice beforehand.
Depending on your painting project, will determine the suggested tank size on an air compressor. Although you can paint with smaller tanks, the compressor may not keep up with the amount of air needed, meaning you will have to wait in between spraying applications for it to fill.
-
- See also: Best 60-gallon air compressor
- See also: Best 80-gallon air compressor
If you would like a few tips on spray painting with an air compressor, keep reading.
Supplies Needed For Spray Painting
- Air compressor
- Paint sprayer
- Paint
- Drop Cloths
- Rags (for wiping spills)
- Tape
- Paint thinner or water
- Bucket (for mixing paint and thinner)
- Mask
- Safety glasses
- Disposable gloves
Steps for Spray Painting With An Air Compressor
Step 1: Before you paint your project, it’s best to survey the area where you will be working. Ensure the area is clean and you have access to an electrical outlet to plug the air compressor into.
Try to avoid the use of multiple air hoses and electrical cords as this may cause your air compressor to work less efficiently.
Step 2: Prepare your clean area with drop cloths and secure them with tape if needed to avoid any paint spillage or over-spray from getting on other surfaces.
This may take time and a bit of effort, but it saves on cleaning afterward. Prepare your project for painting by washing and sanding the surface if necessary.
Step 3: You may have to thin out the paint you have chosen. Some paints are thicker than others and can clog the sprayers. If this happens, the paint will not spray evenly and can make a mess of your project.
If you are using acrylic paint, most times you can add a little water to thin it out. Other paints such as oil-based may need a paint thinner. (Disposable gloves come in handy for this step.)
Once your paint is mixed to the desired consistency, pour it into the paint sprayer container/bucket, being careful not to overflow.
Step 4: Now it’s time to attach the paint sprayer to the air compressor. (If you are not using quick connection couplers, you will need to seal between the hose and the tool with the plumber’s tape to ensure there are no leaks.)
- Connect the hose to the regulator, making sure there are no kinks
- Ensure the drain valve is closed on the tank
- Plugin the air compressor and set the psi on the regulator to the correct pressure depending on the need of the tool used
- Turn the air compressor on and let it run before attaching the sprayer
- Put on your mask (protect yourself from paint fumes) and gloves and attach the sprayer to the air hose
Step 5: You are now set up and ready to paint. Take a couple of practice swipes back and forth on an extra drop sheet to ensure the paint sprays at your desired consistency with no clumps.
It’s a good idea to stand back when applying the paint, otherwise, you may end up with too much paint in an area, causing drips to occur. Try to spray in the same direction, either back and forth, or up and down, or you could end up with a blotchy looking paint job.
Step 6: Wait for the paint to dry in between coats, usually 2 hours, before reapplying.
Step 7: Once you have completed your painting task, be sure to clean your paint sprayer according to the owners’ manual, which most likely will depend on the paint used. Disconnect the hose and open the valve on the tank to drain any moisture before storing.
Tips For Spray Painting With An Air Compressor
- Ensure your painting project is within reach of the air compressor’s ability to be plugged in without the use of multiple cords
- Always have a clean work area in which to paint
- Always have the proper PPE when painting
- Be sure to wait for your project to dry in between coats
- Familiarize yourself with the manual and follow safety rules and guidelines
Final Thoughts
After using an air compressor to paint your projects, you’ll wonder why you haven’t attempted to do so sooner. Be sure to follow the steps and tips above, don’t forget to use proper PPE, and you’ll be a pro in no time.


